How to download YT videos to MP3 or MP4
- Install Free YouTube To MP3 Converter or Free YouTube Download
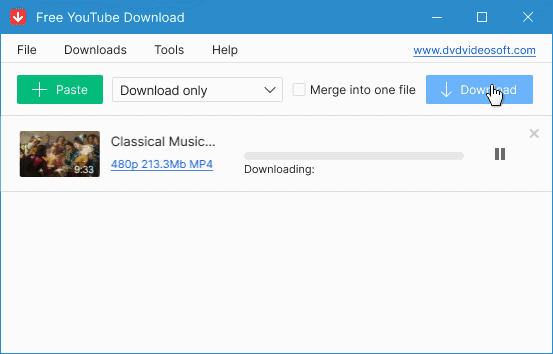
- Add the video URL via "Paste" button
- Press "Download"
- Enjoy video and music!
Invaluable download experience with YouTube
DVDVideoSoft has been present on the market for over 10 years. Founded in 2006 it has gone a long way on the road on the development of the first class multimedia applications.
Among the products released first, were the famous Free YouTube Download and Free YouTube to MP3 Converter. For now both of them are available for PC and Mac, and the total number of installs is more than 300 millions! The number of available options and formats is infinite, despite the fact that most of them are available in free version. We recently released Playlist Downloader and Subtitle Downloader and gathered the best free YouTube downloaders in one article for easier access. All are desktop software programs that are reliable, secure and multifunctional. They have features that online tools usually lack. Try also our Get Video Summary service to get a short description of any YouTube video.
As we didn't stop here, we also released a lot of handy apps for everyday needs such as video and audio editors, screen recorders and different converters. Also, Free Studio bundle was created to unite the most popular DVDVideoSoft applications and it's often compared to 'Swiss knife' for being a multi-tool pack.
What's next
We are passionate about software and we will continue to extend the programs portfolio, as we did before today.